As we’ve mentioned, reusable code is a great thing. Should the day come when you write code for your organization that has broad utility and want to distribute it, you’re going to want to include documentation for the benefit of the developers that will use it.
If you’ve been following the links throughout this site that lead to the Java documentation for the various classes discussed, or have seen the documentation popups in the Java editor in Eclipse, you may have wondered how you, too, can produce that.
Wonder no more. We’re now going to talk about how to generate what’s called Javadoc, a process that produces both HTML documentation and lets you attach it to distributed code to provide context-sensitive help in the Java editor.
Source Code Comments for Javadoc
Javadoc begins with comments on packages, classes, fields and methods. Let’s start with class Temperature in exercise 1 from Lesson 3.
package org.hardknockjava.lesson03.excercise01;

/**
 * Temperature is an abstract class representing a temperature
 * in either Fahrenheit, Celsius, or Kelvin.
 * @see TemperatureCelsius
 * @see TemperatureFahrenheit
 * @see TemperatureKelvin
 * @author Hard Knock Java
 */
public abstract class Temperature {
    /**
     * The word "Fahrenheit"
     */
	public static final String SCALE_FAHRENHEIT = "Fahrenheit";
...
	/**
	 * Superclass constructor stores the value of degrees.
	 * @param degrees The temperature in degrees.
	 */
	protected Temperature(double degrees) {
		super();
		this.degrees = degrees;
	}
...
	/**
	 * Return the temperature in degrees Fahrenheit.
	 * @return The temperature in degrees Fahrenheit.
	 */
	public abstract double getFahrenheit();
Javadoc is generated from comments–and only comments that start with /** (a slash followed by at least two asterisks) on the first line.
The free-form text at the start of the comment, called the main description, becomes the descriptive text to document whatever follows the comment. In this example, the first comment applies to the class declaration, the second applies to the constant SCALE_FAHRENHEIT, the third applies to the constructor, and the fourth applies to the method getFahrenheit().
Javadoc Tags
You’ve probably noticed some annotations within the Javadoc comments. These are called tags, and provide additional text in the documentation. For example:
- @see provides a cross reference link under the heading “See also”.
- @author supplies the author name displayed in the HTML.
- @param names a method argument and follows it with a description.
- @return provides a description of the value returned from a method.
Tags are case sensitive. There are two types: block tags which must be the first text on a line within the comment, aside from the single asterisk if any; and inline tags which can appear anywhere in the main description or in the comments for block tags. Inline tags are surrounded by braces.
A tag may repeat as often as needed within a single comment. Here’s a table of some Javadoc tags.
| Tag | Function |
| @author name-text | Provides name-text as the name of an author. |
| @deprecated deprecated-text | Indicates that whatever follows has been deprecated, as described by deprecated-text. |
| @exception class-name description @throws class-name description | Describes the class name and description of a Throwable thrown by the method described by the comment. |
| {@code text} | The text is displayed as is, without being interpreted as HTML. |
| @param parameter-name description | Names and describes a parameter passed to a method. |
| @return description | Provides a description of the value returned from a method. |
| @see package.class#member label | Adds a link to another class or member of that class (constructor, method, etc.) and uses the label provided to refer to it. #member and label are optional. |
| @version version-text | Provides version information. |
package-info.java
You can’t provide Javadoc for a package in the source code for a class, interface, or annotation. So where can you?
The answer to that is: a file named package-info.java within the package you’re describing.
Here’s the package-info.java for our package.
/**
 * <p>
 * This package contains classes for storing temperatures
 * in degrees Fahrenheit, Celsius, or Kelvin.
 * </p>
 *
 * @author Hard Knock Java
 */
package org.hardknockjava.lesson03.excercise01;
Notice the HTML paragraph tags? Not only are they permitted: in this case, if we don’t indicate the description is a separate paragraph, the author information won’t appear on a separate line in the HTML.
Generating the Javadoc
Since all the Javadoc comments are in place in our project, we’re ready to generate the HTML documentation.
- In the Package Explorer, select the package org.hardknockjava.lesson03.excercise01.
- Select Project/Generate Javadoc… from the Eclipse main menu.
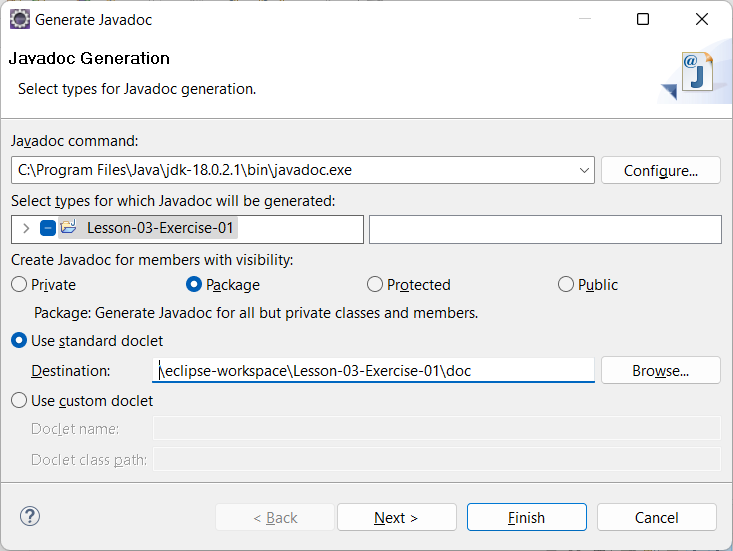
- Use the Browse button to select where you’d like the Javadoc to be generated. We’ve chosen the folder for project Lesson-03-Exercise-01 and added a subdirectory named doc to keep the generated files separate from the rest of the project.
- Select the Package radio button to generate Javadoc for all but private classes and members, and click Next.
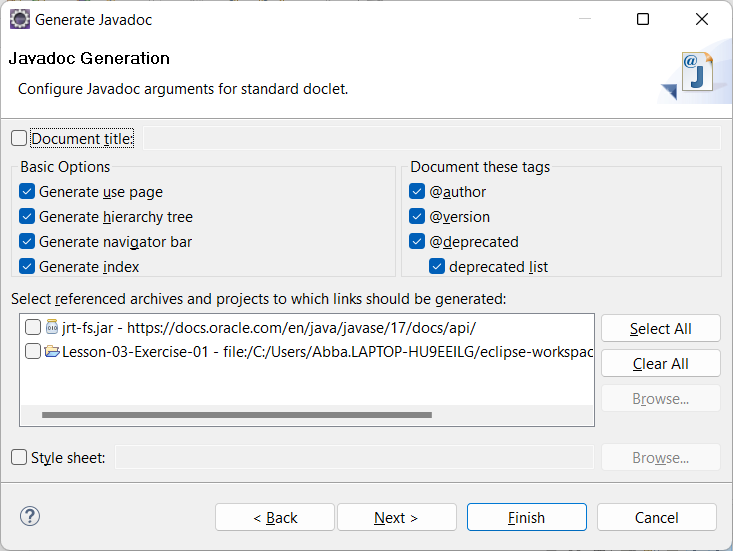
- Accept the defaults. Our Javadoc comments have no links, to we don’t need to indicate where they lead. Click Next.
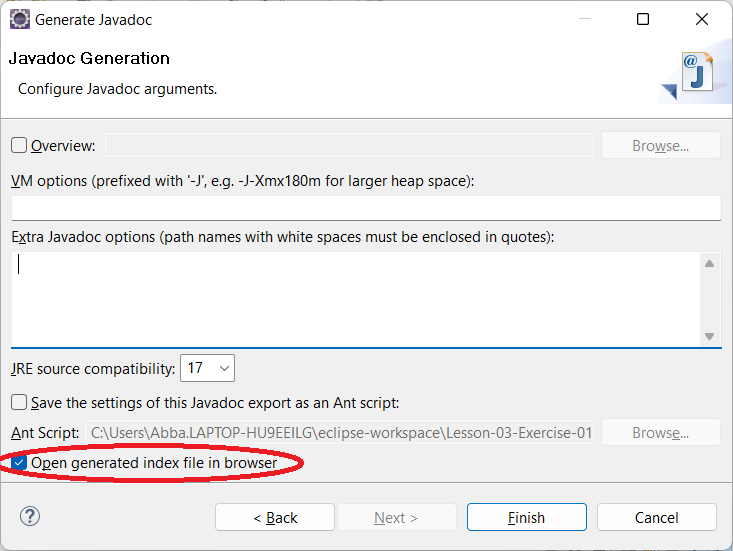
- Check the box marked Open generated index file in browser. This will cause (incredible as it sounds) your Javadoc to be opened in your browser. Click Finish and your browser should show you this:
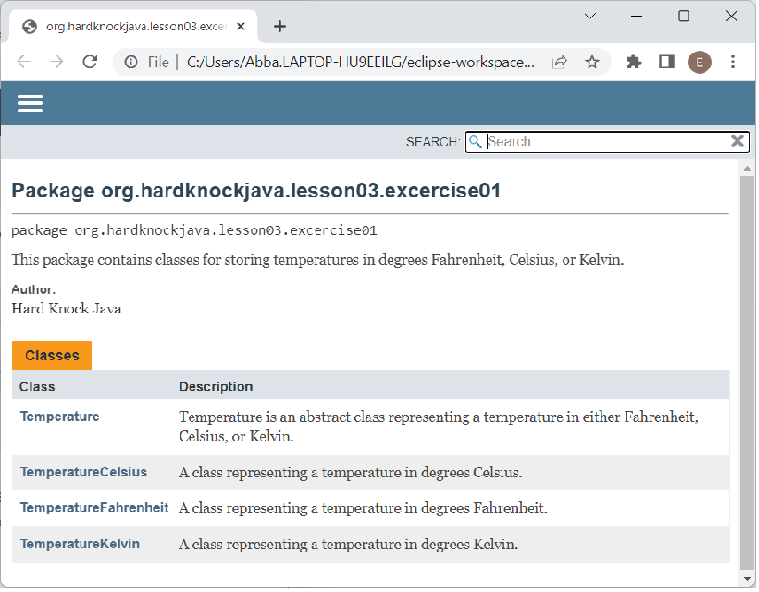
Enjoy following the links around to see how the Javadoc comments led to what you see in the browser.
Creating a Library
Back in Lesson 16, we learned how to create a user library in Eclipse. The library contained object code, source code, and Javadoc. Now let’s do the same for the org.hardknockjava.lesson03.excercise01 package.
Step 1: Export the object code
- In project Lesson-03-Exercise-01, right-click on package org.hardknockjava.lesson03.excercise01 and click Export… from the popup menu.
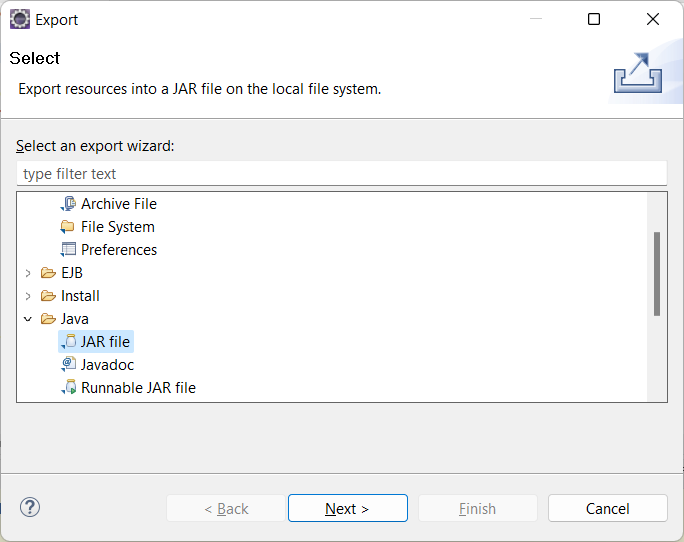
- Select Java/JAR File from the list of export wizards and click Next.
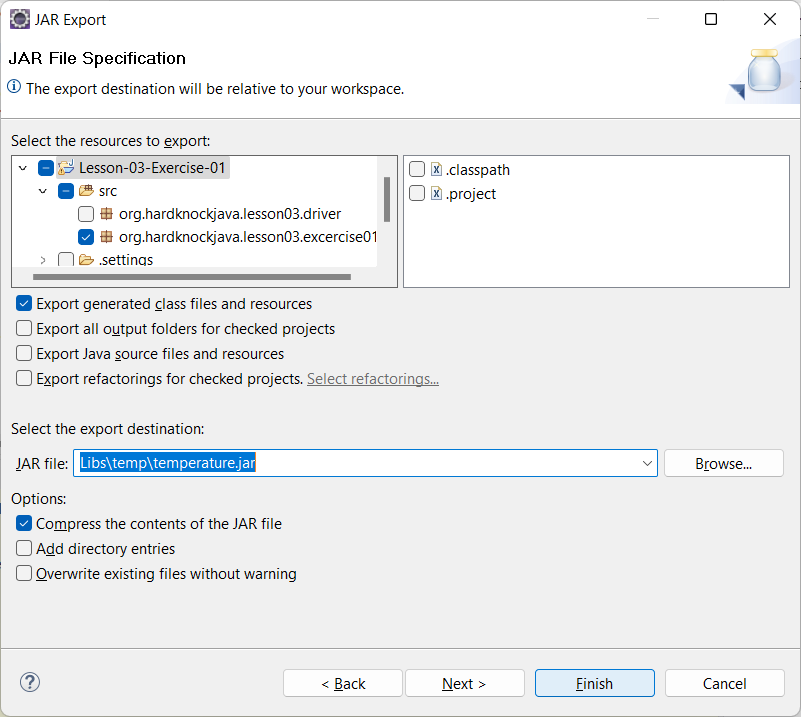
- Check the box next to the package name, org.hardknockjava.lesson03.excercise01. Check the box next to Export generated class files and resources and clear the boxes in front of the other options. For the export destination, enter Libs\temp\temperature.jar. Click Finish.
Step 2: Export the source code
- In project Lesson-03-Exercise-01, right-click on package org.hardknockjava.lesson03.excercise01 and click Export… from the popup menu.

- Select Java/JAR File from the list of export wizards and click Next.
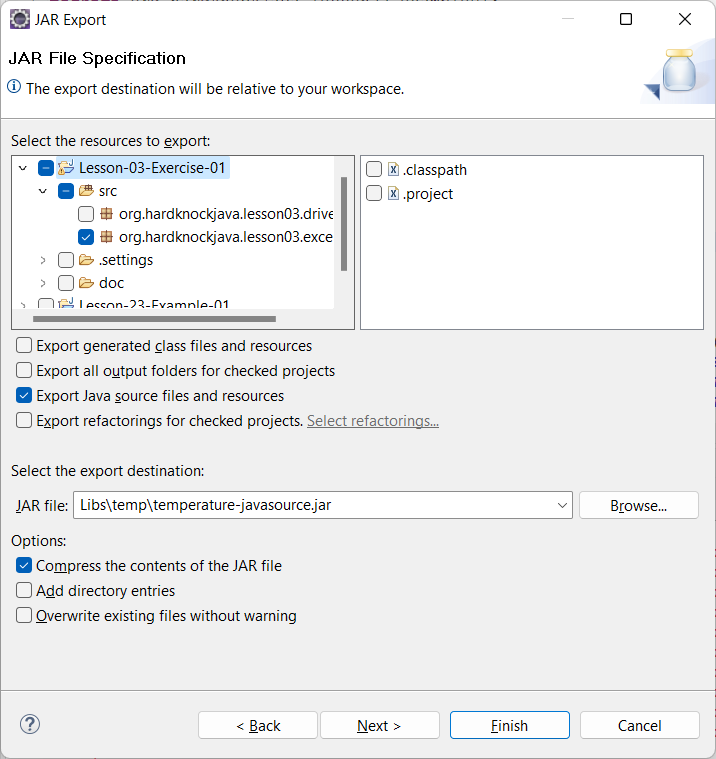
- Check the box next to the package name, org.hardknockjava.lesson03.excercise01. Check the box next to Export Java source files and resources and clear the boxes in front of the other options. For the export destination, enter Libs\temp\temperature-javasource.jar. Click Finish.
Step 3: Export the Javadoc
- In project Lesson-03-Exercise-01, right-click on the doc folder and click Properties… from the popup menu.
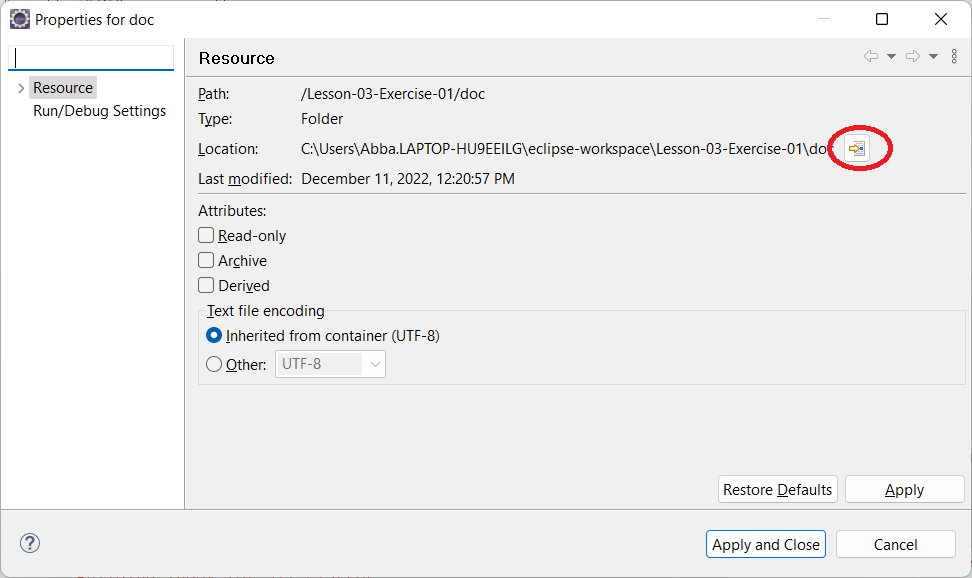
- Click on the Show In System Explorer button (circled above). A dialog will open showing the doc folder.
- Open the doc folder. Use your favorite archiving program (e.g. WinZip) to create an archive named temperature-javadoc.jar and save this archive in Libs\temp alongside the temperature-javasource.jar.
Exercise
Now that you’ve got JARs for the compiled code, the source code, and the Javadoc, follow the instructions in Lesson 16 for creating a library for log4j2, but you’ll adapt them to create a User Library called “temperature,” containing only temperature.jar with which you’ll specify temperature-source.jar and temperature-javadoc.jar as the associated source and Javadoc archives, respectively.
Then copy project Lesson03-Exercise-01 to Lesson-23-Excercise-01, remove package org.hardknockjava.lesson03.excercise01, add your new library to the build path, and try running class TemperatureDriver. Good luck!
What You Need to Know
- Javadoc is generated from comments in the Java code.
- Javadoc has tags that the Javadoc generator uses to produce documentation under specific headings, cross references to other Java objects in the source code, and HTML links, among other functions.
- Java object code, Javadoc, and Java source code JARs are used when creating user libraries in Eclipse.
Next: Internationalization
