Setting up Eclipse
We’ll be doing our Java coding in the Eclipse integrated development environment (IDE). Eclipse is just one of many such software tools for Java development (NetBeans is another), but might be the most popular. Your humble scrivener has worked in four Java shops, and every one of them used Eclipse, so it’s likely the one you’ll be seeing in the wild.
And one more thing: it’s FREE!
Your IDE has your back
You can edit Java programs with any text editor, and can run them from a command line on your PC, but an IDE provides a number of important services that make life a lot easier, including:
- Helping you write your code by offering suggestions for acceptable identifiers, operations, and syntax.
- Flagging errors in code as you type.
- Helping make project-wide changes (such as name changes to code elements) to your code.
- Running your code without the need for you to create the command line required to do so.
- Offering a built-in debugger.
- Exporting your compiled code for deployment.
Downloading and installing the Eclipse IDE
Let’s start by opening your web browser to the Eclipse Foundation download page. To the right you’ll see a choice of Eclipse Installer links; click on the one that mentions your environment (Windows, Mac OS, or Linux) to start the download. And when the download completes, open it to begin the installation process.
The Installer will give you a choice of packages to install. For this course, choose Eclipse IDE for Enterprise Java and Web Developers.
We suggest you add a desktop shortcut to make it easier to open Eclipse in the future.
And now the fun begins…
Whaddya know–the future is here already! Double-click on that desktop icon to start Eclipse and shortly a window like this will appear:

The workspace is where your work gets stored. On the job, you might keep separate workspaces for different target environments or any of a number of other reasons, but for now the default is just fine.
You’ll want to leave that “Use this as the default” box unchecked. In the real world, you might be alternating between projects for multiple environments in your work place, and you’ll probably want each environment to have a workspace of its own.
Click Launch and you’ll see a Welcome window. Close it and this is what you get:
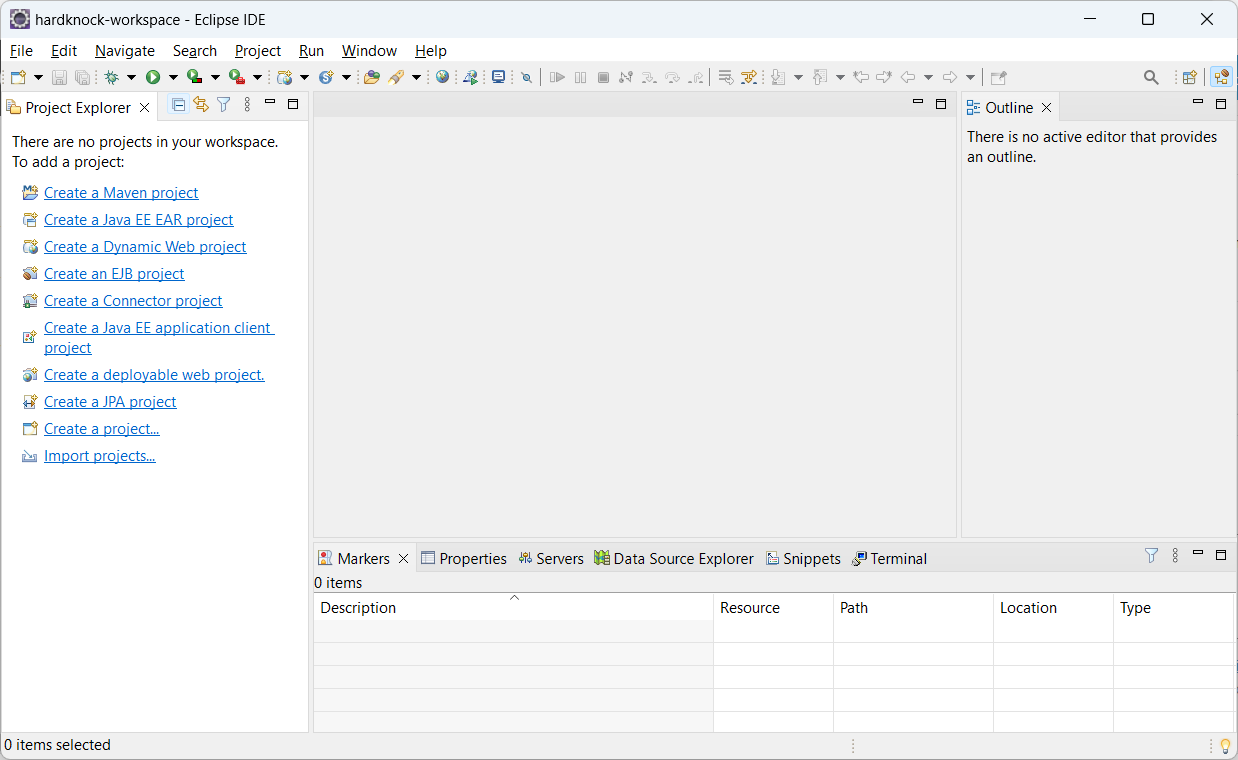
Before we explain what you’re looking at, there’s a really important set of options you have to deal with in order to get the benefits of content assist.
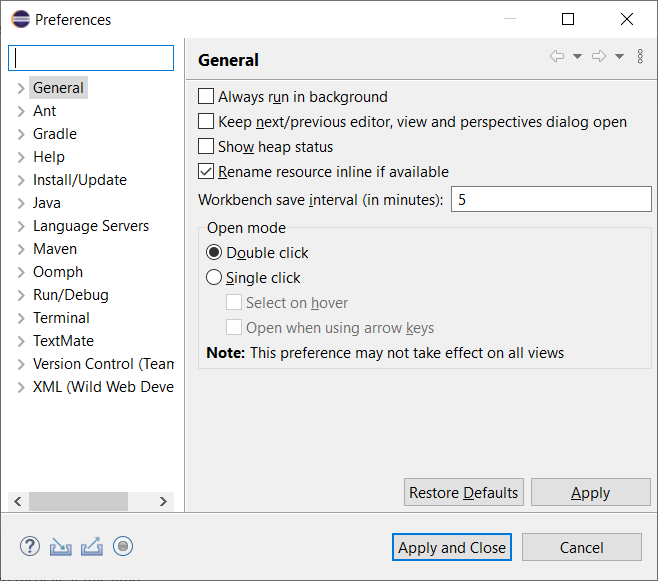
Click on Window/Preferences and this appears:
Work your way through the tree on the left to Java/Editor/Content Assist/Advanced. Make sure that these boxes in the two boxes on the right are checked (some of these appear in both boxes):
- Java Proposals
- SWT Template Proposals
- Template Proposals
- Java Non-Type Proposals
- Chain Template Proposals
- Java Type Proposals
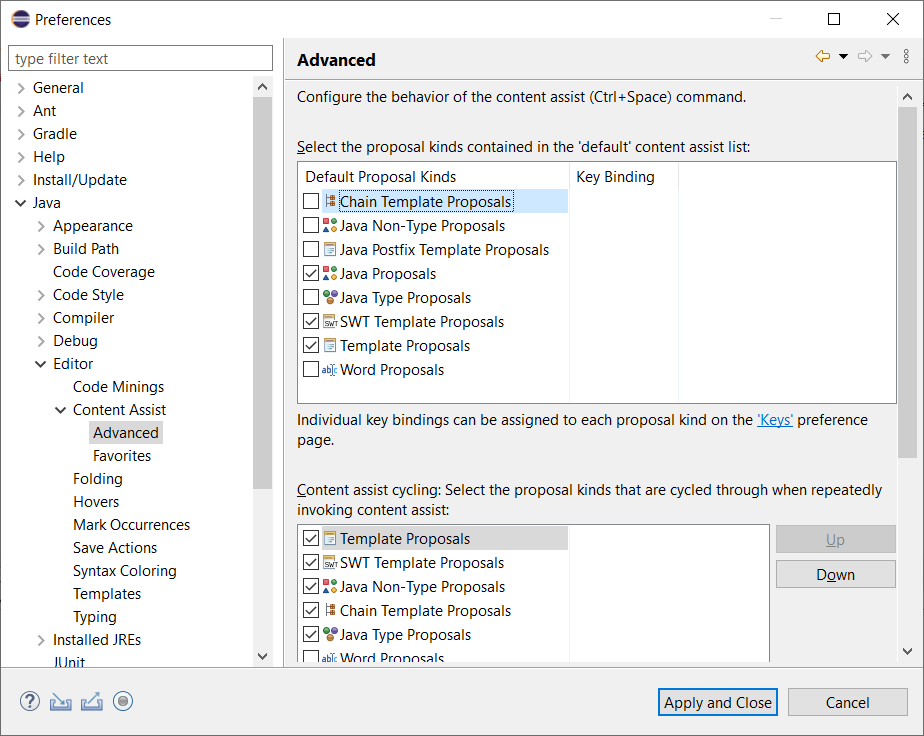
Finally, click on Apply and Close. You’ve just fixed a problem with the current version (as this is written) of Eclipse: content assist is not by default working properly.
One More Thing and We’ll Be Ready
This course uses a lot of third-party software in its examples and exercises. Our next preparatory step is to bring it into your workspace for easy access.
We keep this software in a project we’ve called Libs. Download it here and follow the instructions here to import it to your workspace.
The Libs project gathers all the JARs you’ll need for this course into your workspace for convenience. Eclipse dialogs for adding JARs (and other files) to build and runtime classpaths make it easier to locate them within the workspace than from outside it.
Now, this will probably be the only workspace you have on your computer, so storing all these files in your workspace is perfectly fine. But in a development environment you might have several workspaces. Rather than having you replicate needed JARs in all your workspaces, Eclipse lets you link to them instead.
You can add a project like Libs to your IDE and use your mouse to drag files and folders (particularly JARs and folders containing JARs) into the project from wherever they are. When you make the drop, Eclipse opens a dialog like this for an individual file:
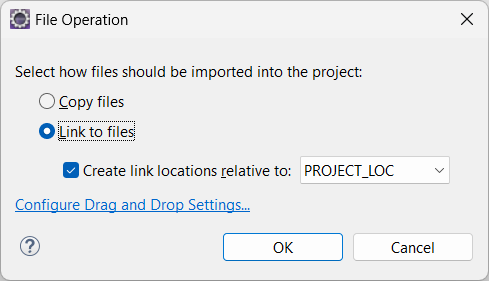
or like this for a folder:
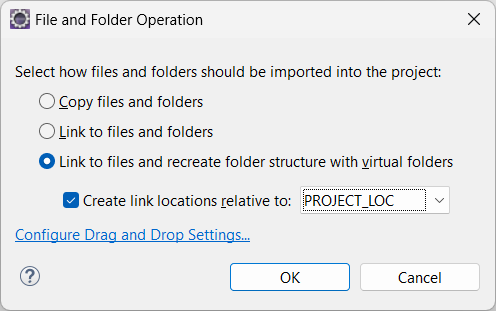
Accept the options shown and you can then refer to the added files as though they actually were in your workspace.
(There’s no practical difference between the two link options in the “File and Folder Operation” dialog.)
And now you’re ready to create your first Java project. Click here to continue.